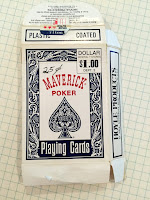
It's fun to make little books using deconstructed boxes as the covers. I've made several lately, some with covers made from playing card boxes and others using Lemonheads candy boxes. When I posted photos on some of my favorite artsy Facebook groups, some FB friends asked me how to make them, Here's a tutorial for the playing card box book.
SUPPLY LIST.
Here's what you'll need to make this book:
- Playing card box (measurements here are for POKER playing card boxes)
- Miscellaneous papers for inside pages
- Glue stick or your favorite type of adhesive for paper
- Japanese book drill to make holes for binding (if you don't have the Japanese book drill, you can use an awl)
- Heavy-duty needle
- Waxed linen thread (waxed dental floss will work if you don't have the thread)
- Ruler
- Scissors
- Craft knife
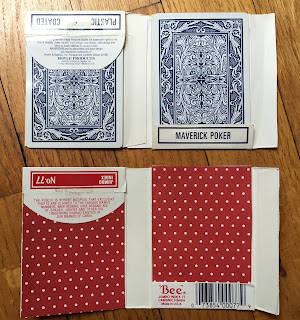
 MAKING THE COVER.Empty your box, and carefully pull the bottom section apart. Usually the glue is not too strong and you can just pull the bottom panel away by hand.If the glue is a challenge, you can use a letter opener.
Next, cut along the fold to the right of the front panel of the card box. It's easiest just to use scissors; you can always straighten the cut with a craft knife after the box is flat.
As shown in this photo, cut the extraneous box parts away. Remove the four tiny flaps on the sides of the top and bottom, and the blank flap at the bottom. I like to keep the curved top flap as a design element for the inside cover, and I keep the straight bottom flap to make the back cover sturdier. You can keep the side flap and fold it over the book's edge, or you can remove it.
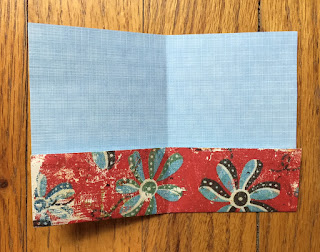
 INSIDE COVERS. You can use a playing card to decorate the inside front and back covers (top example) or you can line the inside covers with decorative paper (bottom example).
You can add a strip of washi tape to the outside flap should you decide to keep it.
I suggest leaving the center panel naked because when you bind the book, it will be easier to get the waxed linen thread through a single layer, and because the center panel won't show anyway after you've bound the book.
 INSIDE PAGES. I have used all kinds of media as my inside pages, including ephemera, coffee packaging, maps, colorful magazine covers, envelopes, shipping tags, junk mail parts, and scrapbook paper.
When I want to use the books for journaling, I glue a layer of lined, graphed, or blank paper to write on. This photo on the right shows some of the papers I cut to add space for writing: graph paper, accounting ledger paper, to-do list paper, planner sheets, game score sheets, printing practice pads, grocery list pads and conventional stationery. I found all of these items -- very inexpensively -- at garage sales, with the exception of one pad that was an advertising give-away from a print shop.
MAKING INSIDE PAGES.
Poker playing cards are 2.5" wide by 3.5" tall. Each sheet of paper bound into your book will be folded in half, so you will cut your paper 5" wide by 3.5" tall.
Hint: Cut one 5" x 3.5" sheet from sturdy cardstock (or a manila file folder) using your paper cutter or a ruler and craft knife. You can then use that as a guide for cutting lighter-weight pages with scissors. Pages with torn edges are interesting, too, so not every page has to be precisely measured and cut.
If you want to add space to write on a spread that is otherwise too busy for journalling, just add a layer of lined paper. This addition is from a small planner page, so the line spacing is proportional to the small size of the book.

If you want a page with an edge that folds INWARD to make a flap, cut paper wider than 5 inches.
If you want a page with an edge that folds UPWARD to make a pocket, cut paper taller than 3.5 inches.
NEXT: Assembling signatures and binding the book


4 comments:
Wonderfully creative! Thanks for the instructions. I think I'll try one :)
Carolyn
Those are really cute! So love the upcycling idea! I have made another version of these using mini cereal boxes; they make cute gifts, too. Had not seen the playing card version, will try that one for sure.
I love this! I'm going to go hunt up a fun box right now! Thanks for taking the time to put this together.
Thank you for stopping by -- and thanks for the nice words! I hope you'll come back and leave a link to pictures of your little books when you make them. I'd love to see them!
Post a Comment