Mouse in the House background

Monday, September 25, 2017

Dipping my toes in YouTube water!

Gulp! I have finally dipped my toes into YouTube water. Here is one of my first videos: Collage journal flip-through


Let me know what you think. I have a stack of journals I'd like to film, but I'm not very good at this yet, so it takes me a lot of time.

See you on YouTube!

Bonnie

Wednesday, July 20, 2016

Let's make a mini-book, part 2


Welcome to part two of instructions for making a mini-book from a playing card box. Part one covered setting up the cover and making the pages. Part two covers assembling the pages into signatures and binding the book.

ASSEMBLING PAGES INTO SIGNATURES.
After you've cut and folded the inside pages for your book, you'll want to arrange them in a pleasing order and group them into signatures. A signature is a group of pages bound together in a book. Using four to five pages per group, assemble three groups of pages, and those groups will become the signatures.  Below are the pages that will become my signatures. The first two groups have 5 pages each, and the third group has only four because the center spread is an envelope that is folded twice, so will be bulkier than the others.


TEMPLATES FOR BINDING.
Next, you will prepare to punch the holes for binding by making two templates. The first template will be a guide for punching the nine holes in the spine of your book, and the other will be a guide for punching the three holes in each of your signatures. Use sturdy card stock or a manila file folder to make these templates so they will not tear in use.

SPINE TEMPLATE.
For the spine template, cut a rectangle the size of the center panel of the box. The panel of my box was a bit less than 3/4" wide and exactly 3.5" tall.

Next place the spine template next to a ruler and make a pencil dot at the 3/4", 1-3/4" and 3" points (see below). Using the ruler across each of those points, make three dots in a row, equally spaced. As you can see in the second rectangle below, you will end up with nine dots in three rows of three.

Use the 9-hole spine template to place the holes in the center panel or spine of the book. I use a Japanese book drill, my favorite bookbinding tool, because I like clean, crisp holes. If you don't have a book drill, you can use an awl.

SPREAD TEMPLATE.
The second template is for the three holes that go in the center of each spread. Using card stock or a manila file folder, cut a piece about 1-1/4" to 1-1/2" wide and 3.5" tall (the height of the spine). Fold this piece in half and use one row of the spine template to punch holes through the center fold of the spread template. Mark the top of the template so that, in case of slight variations, all of your spreads will be punched in the same three places.

Open the first spread of pages and straighten it so that all pages in the spread are aligned, then use binder clips to secure both sides to keep it straight while you punch.  Leave the binder clips on after you punch the holes, because they will help keep the spread in place as you bind the book, as well.


PREPARING THE WAXED LINEN.
After you've punched holes in all of your signatures, you are ready to measure the waxed linen thread you'll use to bind the book. Unwind the waxed linen thread (or waxed dental floss) and use the spine of the book to measure 12 spine-lengths of thread. That's a bit more than you will need, but it's always better to have too much rather than too little. Cut the thread and thread the needle, leaving a tail of about 2 inches, and you're ready to start sewing.

You'll add the three spreads to the book one at a time, using the same length of thread. There will be a knot at the beginning and a knot at the end, but no cutting until after the final knot.

Select either the first or the last of the three spreads and align the three holes in the spread with the appropriate three holes in the spine. I started with the last spread, so I lined up the holes with the last set of holes in the spine and started to sew. 

Pull the thread from the INSIDE center hole of the spread to the outside center hole of the book and make a knot inside the spread (see below). Then bring the needle back through the top hole of the book and the spread. Go BACK out through the center, being careful not to push the knot through your hole. Bring the thread out of the center hole, then bring it back into the bottom hole of the book spine and through the bottom hole in your spread and back through the outside of the book. Leave the thread hanging outside that center hole, then add your CENTER spread to the book. Cross that thread from the outside horizontally to the center hole of the center spread, and follow the same pattern, then repeat with the last spread.  

Your spine will look like this, with long strips of thread between each hole vertically and very short strips of thread at the center horizontally.


Congratulations! Your book is bound and ready to decorate, embellish and add journalling!  

Sunday, July 17, 2016

Let's make a mini-book!


It's fun to make little books using deconstructed boxes as the covers. I've made several lately, some with covers made from playing card boxes and others using Lemonheads candy boxes. When I posted photos on some of my favorite artsy Facebook groups, some FB friends asked me how to make them, Here's a tutorial for the playing card box book.


SUPPLY LIST.
Here's what you'll need to make this book:

  • Playing card box (measurements here are for POKER playing card boxes)
  • Miscellaneous papers for inside pages
  • Glue stick or your favorite type of adhesive for paper
  • Japanese book drill to make holes for binding (if you don't have the Japanese book drill, you can use an awl)
  • Heavy-duty needle 
  • Waxed linen thread (waxed dental floss will work if you don't have the thread)
  • Ruler
  • Scissors
  • Craft knife
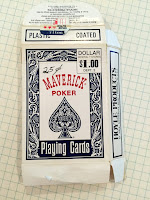
For this demo, I'm using a box that held poker playing cards. Poker cards are slightly larger than regular playing cards, and they are easy to find at garage sales, flea markets and thrift stores because casinos use them only one time before giving them away. As you can see from the photo, this box of cards was 25 cents (and only $1.00 originally!). When I am done making this book, I'll cover up the pricing with postage stamps or another graphic element.


MAKING THE COVER.Empty your box, and carefully pull the bottom section apart. Usually the glue is not too strong and you can just pull the bottom panel away by hand.If the glue is a challenge, you can use a letter opener.

Next, cut along the fold to the right of the front panel of the card box. It's easiest just to use scissors; you can always straighten the cut with a craft knife after the box is flat.

As shown in this photo, cut the extraneous box parts away. Remove the four tiny flaps on the sides of the top and bottom, and the blank flap at the bottom.  I like to keep the curved top flap as a design element for the inside cover, and I keep the straight bottom flap to make the back cover sturdier. You can keep the side flap and fold it over the book's edge, or you can remove it.


INSIDE COVERS. 
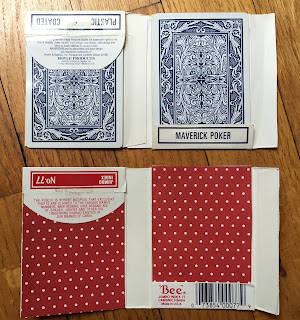
You can use a playing card to decorate the inside front and back covers (top example) or you can line the inside covers with decorative paper (bottom example).

You can add a strip of washi tape to the outside flap should you decide to keep it.

I suggest leaving the center panel naked because when you bind the book, it will be easier to get the waxed linen thread through a single layer, and because the center panel won't show anyway after you've bound the book.


INSIDE PAGES. 
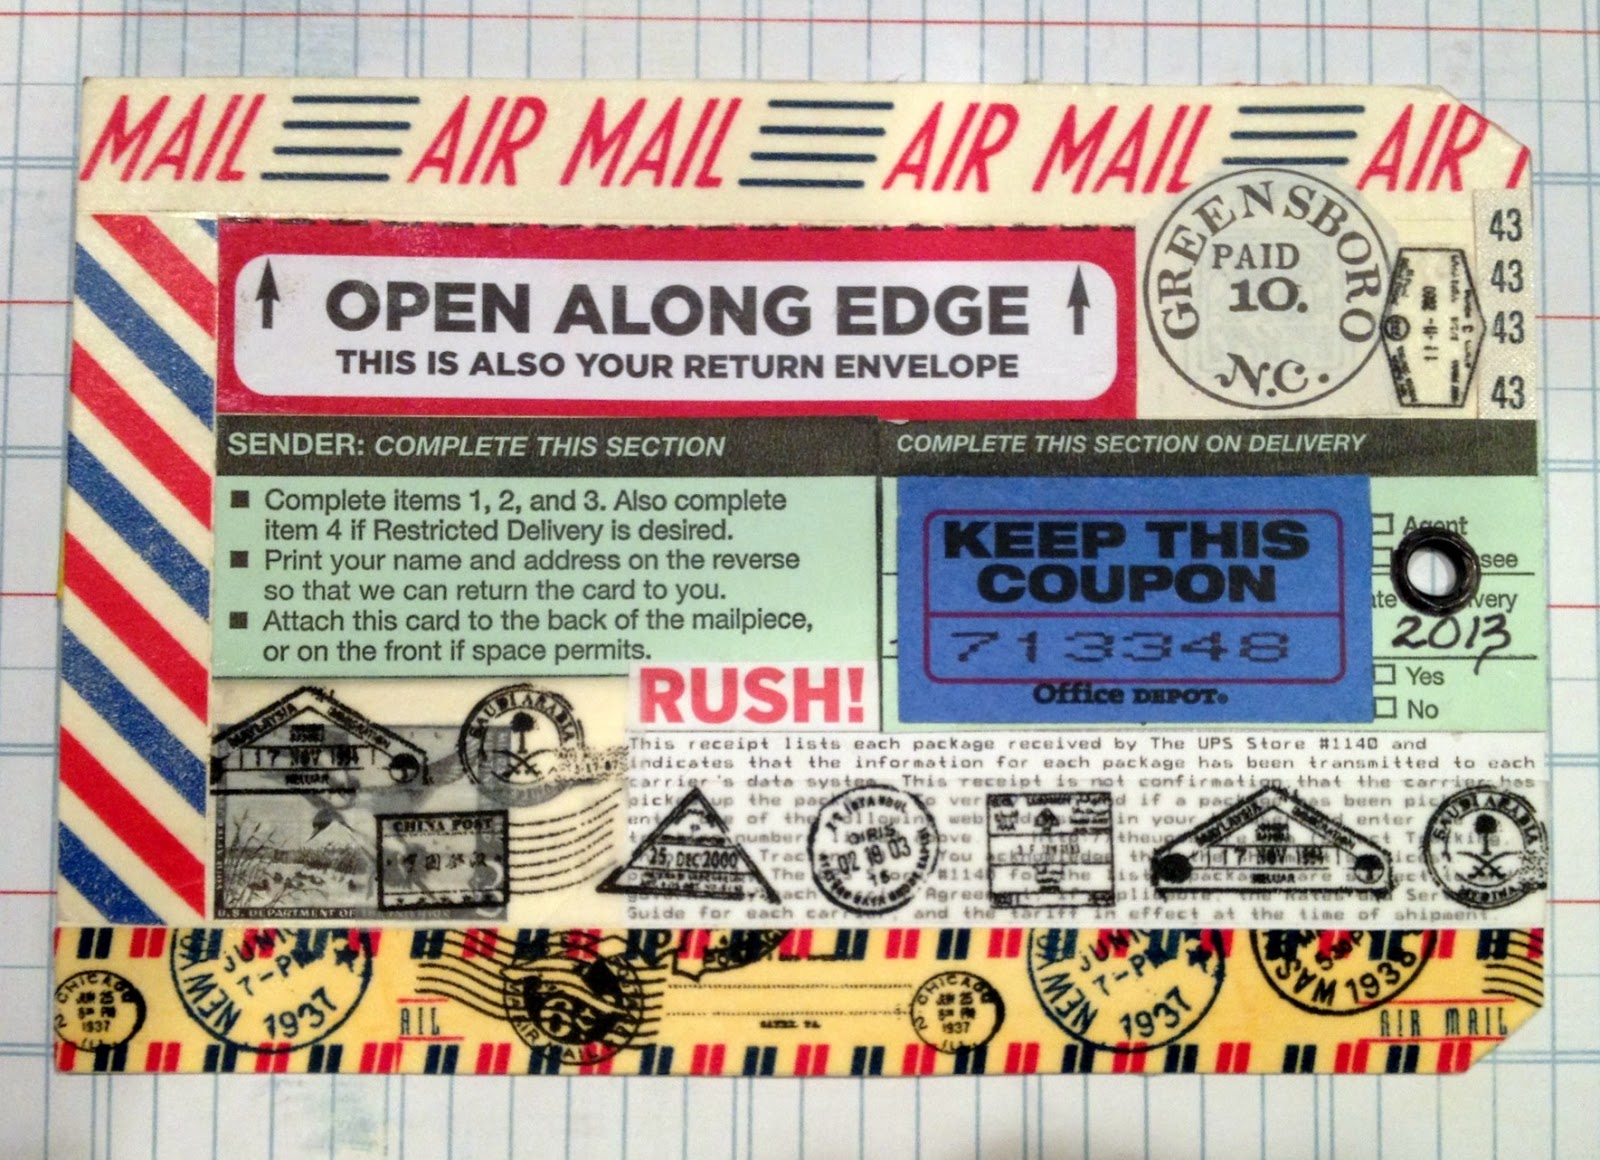
I have used all kinds of media as my inside pages, including ephemera, coffee packaging, maps, colorful magazine covers, envelopes, shipping tags, junk mail parts, and scrapbook paper.

When I want to use the books for journaling, I glue a layer of lined, graphed, or blank paper to write on. This photo on the right shows some of the papers I cut to add space for writing: graph paper, accounting ledger paper, to-do list paper, planner sheets, game score sheets, printing practice pads, grocery list pads and conventional stationery. I found all of these items -- very inexpensively -- at garage sales, with the exception of one pad that was an advertising give-away from a print shop.


MAKING INSIDE PAGES.
Poker playing cards are 2.5" wide by 3.5" tall. Each sheet of paper bound into your book will be folded in half, so you will cut your paper 5" wide by 3.5" tall.

Hint: Cut one 5" x 3.5" sheet from sturdy cardstock (or a manila file folder) using your paper cutter or a ruler and craft knife. You can then use that as a guide for cutting lighter-weight pages with scissors. Pages with torn edges are interesting, too, so not every page has to be precisely measured and cut.


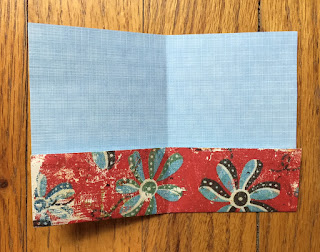
If you want to add space to write on a spread that is otherwise too busy for journalling, just add a layer of lined paper. This addition is from a small planner page, so the line spacing is proportional to the small size of the book.


If you want a page with an edge that folds INWARD to make a flap, cut paper wider than 5 inches.


If you want a page with an edge that folds UPWARD to make a pocket, cut paper taller than 3.5 inches.


NEXT: Assembling signatures and binding the book

Wednesday, August 27, 2014

Some quick, no-pressure ways to make art every day

Index card art is simple and quick, but fun!

Many of my artsy friends complain that have trouble finding the time to do art. Responsibilities of children, jobs, and just life in general often make leisurely art days a huge challenge. However, since putting our energies into art can be so rewarding -- and so relaxing -- it's great for us (and our families!) when we CAN make the time for artsy activities.

Here is a great way I've found to work some creative projects into a busy day: Use a small canvas. I don't mean a small stretched linen canvas; I mean a small surface. A blank book -- or even a large blank page in a sketchbook -- can be intimidating if I only have a few minutes for art. Using a small surface allows me to accomplish something in a minimum amount of time. My favorite small canvases are:

  • Index cards
  • Playing cards
  • Rolodex cards
All of these are small, inexpensive, and easily accessible.  If you don't have any around your house, all three can be found at thrift shops, flea markets or Dollar Stores.


There's no need for expensive or extensive collections of art supplies either. An inexpensive glue stick, a pair of scissors, some paint or ink pads, old magazines or a stack of incoming junk mail can give you plenty to work with. I also like to use decorative napkins; more on that technique later.

Pull out your supplies and put them on a tray or in a basket so you can grab them when you have a few minutes to spare. Multitask! You can make a little piece of art while drinking your morning coffee, watching television, talking on the phone, or waiting for something to bake in the oven. 

If you are at a loss for ideas, prompts can be very inspiring. Tammy Garcia's Daisy Yellow art blog is full of theme suggestions. Tammy created a popular group challenge called "Index-Card-a-Day (ICAD)" and, even though her recent Summer challenge is over, her prompts for previous challenges can inspire you. You can find these on her blog.

Here are some of my ICAD projects and the prompts or themes that inspired them.

ICAD theme: Nature (The flower and butterfly are cut from a paper napkin.)
ICAD prompt: The color orange
ICAD prompt: Make a collage using one staple (Fun and VERY quick!)
ICAD prompt: The color yellow

ICAD prompt: Just stickers (Another one that's easy and quick!)

You can see how simple and quick these are, but creating a little art every day is great way to lift your spirits. If you are pressed for time, you can still make one. If you have a little more time, you can make more than one. You get a creative break and you gain a sense of accomplishment because an index card is something you can easily finish. (Sometimes all those unfinished art projects can CAUSE stress instead of relieve it!)

Next time I'll show you some quick projects you can do with playing cards and decorative paper napkins.

I hope you'll take a art break today!


Friday, July 11, 2014

It's studio tour time again! Where Bloggers Create 2014


Welcome to my happy place. Thanks to Karen Valentine of My Desert Cottage  for hosting another Where Bloggers Create event! This is my second year at the party, and I appreciate all of Karen's efforts to make this event exciting and fun. 

The photo above is a studio view from the doorway. My studio is three steps down from our dining room. New in this area since the last year's WBC party are the pull-down school maps on the back wall and the chest of map drawers (below).


I've been calling this a map cabinet because the drawers are large and shallow, but the chest was actually handmade to store hardware in someone's garage. I saw it in the bed of a pick-up truck and asked the driver if it was for sale. Lucky for me, the answer was yes! It was a mess when I bought it, but a friend repaired it for me, and I love it because it is so useful. The bin pulls are solid brass and the sides are beadboard.


One large map drawer holds washi tape in plastic trays from cracker packages.

This tall 40-drawer Post Office cabinet (below) is my pride and joy. It looks like a card catalog cabinet in photos, but it is much larger. The drawers are 8-1/2" wide and 24 inches long. so they hold a LOT! The second photo below shows all the vintage oddities I put on top of it.

Love this 5-foot-tall Post Office cabinet!  I'll show you what's in some of the drawers later.

A hodgepodge of vintage goodies that caught my eye: folk art American flag on corrugated metal, parking meter, beach pail and shovels, toy trucks, toy cash register, vintage tins, and what some people call "creepy doll heads." 


Another of my favorite pieces is this golden oak McCaskey Register System from the early 1900s (sitting on top of an oak card catalog cabinet).  This historic piece of furniture was part of a revolutionary accounting system for department stores and other businesses. (I call it the earliest version of QuickBooks.) The piece has large shallow drawers under glass, where ledgers displayed customer account numbers. Above the glass are metal fold-down receipt holders where numbered compartments hold clips for each customer's receipts. When the customer came to pay on his/her account, the store owner would look up the account number and then total the receipts for payment.


The receipt holders fold down and I use them for vintage photos, artwork and ephemera. 7 Gypsies produced a perfectly accurate replica of the black metal McCaskey receipt holders a few years ago as display pieces for artists. While 7 Gypsies did a great job with the reproduction, I think it's pretty exciting to have the genuine article!

I'm using the ledger drawer to display a collection of vintage office supplies.


Just some more of my funky stuff... I actually use the antique fan, but not the oversized pencils. (I found the pencils just last month, one at a time!) The hand-painted spool drawers hold rubber stamps for mail art projects. Everything in this picture was found at a local flea market except the stereo and the figural brush, which was a gift from my mother.


Can you guess my favorite color? I love my little red Corona typewriter and vintage red Arrow stapler. The Sychro-Jr. Jig Saw for Boys belonged to my father when he was a teen. He used it for model airplane making.The jig saw still works, as does the vintage Kodak photo developing timer. The metal Duro Sign Maker box holds some of my handmade books, and the little red metal blasting caps box holds some of my ATCs.  Shallow drawers below hold rubber stamps organized by theme.  It's nice that the drawer pulls are label holders; they make it easy to keep track of which theme is in each drawer.


Some of the many things I collect in my studio are vintage children's art supplies. I love the cute illustrations and the colorful packaging. Vintage watercolor tins are among my favorites.I had the same Playtime watercolor tin when I was a child, so it was a thrill to find that at a garage sale.  Did you notice the original price? 29 cents!  It's a bonus to be able to use the contents!

I hope you have enjoyed this peek into my studio, and I hope you'll stop by my blog again to download free printables. I have some wonderful ephemera to scan and share with you.

Be sure to visit the other WBC blogs to see more studios (via the link in my sidebar) --- and please stop back by here tomorrow for more pictures of my studio! 

Bonnie

Wednesday, July 9, 2014

Mail art: the beginning of beautiful friendships


Nearly 20 years ago when my sons were small and I had an irregular work schedule as a freelancer, I got involved in art swaps via mail. Swappers were an eclectic group of strangers who enjoyed using software called Print Artist got together online to chat about the software and artsy projects we could make using the software. We exchanged handmade greeting cards, postcards, bookmarks and other paper craft projects via mail. The exchanges were really fun, and these strangers became online friends.  Later, after meeting in person at national conventions and regional get-togethers we called "mini-meets," many of us became real-life and in-person friends. Some of these have become close, lifelong friends. 


My husband and I are empty nesters now and I have scaled back my work hours. It's nice to have a little more time for art, and I've been taking art classes and dabbling in art journaling, mail art swaps and book projects.

Twenty years ago, it was exciting to get email.  (If you are of my era, you'll remember being happy to hear the old AOL sound bite: "You've got mail!"). Today, our email Inboxes are so filled with spam, constant audible announcements would drive us crazy. Today, it's rare and exciting to get a physical letter or a hand-addressed card in the little black box at the bottom of our driveway.  

Receiving mail art is even more exciting because it's a big pop of color and surprise in your mailbox. And making mail art is as much fun as receiving it.

One of my favorite contemporary artists is Seth Apter of The Altered Page.  Seth might not be an artist today if he hadn't been introduced to mail art!  He was vacationing in Vancouver when he bought a piece of art at a gallery. The gallery owner sent him a mail art thank you, and he felt he should respond in kind, so he crafted a mail art reply. This serendipitous mail art exchange with the gallery owner was the beginning of a close friendship AND the beginning of Seth's interest in becoming an artist. (We should all send the gallery owner a thank you for inspiring that!)

Mail art, which is basically just decorative mail, is a simple art project that is fun, simple, and easy to make time for.  Instead of writing an address on a plain envelope and adding a Forever stamp, mail artists will use paint, rubber stamps, washi tape, ephemera, images clipped from books and magazines, and multiple postage stamps to make that envelope anything but plain. And sometimes mail art is putting a stamp on a rubber duckie... or a pair of flipflops.

Below are some examples of my mail art postcards and envelopes. They are messy and busy, and sometimes silly, but they were fun to make and (I hope) fun to receive. 


 Mail art postcard: Paper napkins, ephemera, images and letters cut from magazines

Mail art postcard: Washi tape, labels, game ephemera

Mail art envelope front: Rubber stamping, washi tape, letters cut from magazines,
mail-themed postage stamps

Mail art envelope back: Rubber stamping, washi tape

Mail art postcard using paper napkins, ledger paper, rubber stamps and washi tape
Back of mail art postcard with washi tape, rubber stamps, postal ephemera, etc.

Sometimes it's fun to follow a theme with your mail art. My sister loves animals, so I collected animal images and animal-themed postage stamps to make this oversized envelope for her.


Large envelope with rubber stamping, images and letters cut from magazines, animal-themed postage stamps

Three blogs I enjoy focus on mail and mail art.  Check them out:

Every day is a red letter day

Cappuccino and art journal

Mail me some art

Karen Isaacson of "Mail me some art" hosts several themed mail art swaps every month. Her swaps are a great way to get started with mail art. Open swaps are listed here.

Make someone happy today by sending a mail art postcard, envelope or letter!  You might even make some wonderful new friends.

I hope you have a good mail day!

Bonnie